Bulk logo golf balls fail when printing choices ignore durability, color control, and proof discipline. One bad batch can mean event-day embarrassment, retail returns, or hidden rework costs.
To choose the best logo printing for wholesale golf balls, match your logo complexity to the process (pad for 1–2 spot colors, UV for full color/gradients) and validate it on your exact Surlyn/urethane cover and finish. Require an adhesion deliverable, 20× macro edge photos, and batch QC logs before mass production.
Below is the decision path procurement teams use to prevent peeling logos, color disputes, and schedule slips.
The most durable golf ball logo printing is the method that passes a cross-hatch and tape pull check on your exact cover and finish, then stays visually acceptable after controlled wear. As of 2026, B2B buyers treat durability as evidence—photos, videos, and batch logs—rather than a promise.
What makes a golf ball logo print truly durable?
A logo can look perfect in a mockup and still fail after real use if the ink never truly bonded to your ball’s cover. For US/EU buyers, that turns a branding item into a reputational risk.
A logo print is truly durable when the ink layer stays bonded to your specific cover material after an adhesion check—not just when the sample looks sharp. Lock the cover/finish + ink system, then require an adhesion deliverable tied to the batch/date and a controlled wear check to define “acceptable cosmetic change.”
Durability has two different outcomes, and mixing them up creates bad decisions. First is bonding: does the ink chip, peel, or lift from the cover under stress? Second is cosmetic wear: even if the ink stays bonded, does scuffing or surface rub look acceptable for your program (corporate gifting vs retail resale)?
The buyer-safe move is to stop treating durability as a promise and start treating it as a deliverable. That means the supplier prints and tests on the same cover material and surface finish you will mass-produce, then documents the result in a photo/video log. If anything changes between sample and production (ball model, finish, ink series, curing window), the sample approval stops being a reliable predictor.
How do you interpret ISO 2409 or ASTM D3359 results?
You don’t need to memorize standards. You need a pass/fail language your receiving team can enforce and evidence that can’t be swapped out.
If you reference an ISO 2409 cross-hatch or a comparable ASTM D3359 tape-test approach, keep three things explicit in your PO/QC terms: the test method, the pass grade you’ll accept, and what the supplier must provide as proof. Many procurement teams target top-grade outcomes (often written as ISO 2409 Class 0–1 or a comparable high-grade tape-test result), but the practical protection is the deliverable: the scored grid, the tape pull, and the after-image—on your exact cover/finish and tied to the production batch/date.
✔ True — “Durable” is useful only when it’s testable on your exact ball.
A clean sample can be misleading if it was printed on a different cover, finish, or ink system. Ask for a cross-hatch + tape pull deliverable on the same cover/finish you’ll mass-produce, and tie it to a batch/date so it’s procurement-grade evidence.
✘ False — “If the sample looks sharp, it will survive play.”
Sharpness proves print resolution, not bonding. Without adhesion evidence, peeling becomes a subjective dispute instead of an objective pass/fail.
Pad or UV printing for bulk orders—how to choose?
Most pad vs UV comparisons stop at “pros and cons” and miss the constraints that matter in volume: your artwork at real size, your cover/finish, and how stable output stays across thousands of balls.
Choose pad printing when your logo is 1–2 solid spot colors and you want repeatable edge quality across a large run. Choose UV printing when you need gradients, full color, or fine image detail—then protect yourself by requiring on-ball macro photos plus an adhesion deliverable before you approve mass production.
| QC dimension | What can go wrong | What to request | How to verify | Accept/reject rule |
|---|---|---|---|---|
| Adhesion | Peeling/chipping | Adhesion photo/video log | Evidence tied to batch/date | Pass per agreed method |
| Edge clarity | Jagged micro-text | 20× macro photos | Smallest text readable | No edge breakup |
| Registration | Color misalignment | Multi-color proof + macro | Visual alignment check | No visible offset |
| Color intent | Brand mismatch | Proof with codes + record | Approval under defined lighting | Matches documented method |
| Placement | Off-center | Print area dimensions on proof | Random sample photos | Within agreed language |
| Consistency | Sample ≠ mass | Pre-production sample + QC log | Spot-check photos across run | Matches golden sample |
| Compliance docs | Customs/retail delays | MSDS + ink brand/series + compliance statement | Docs match destination requirements | Docs received pre-production |
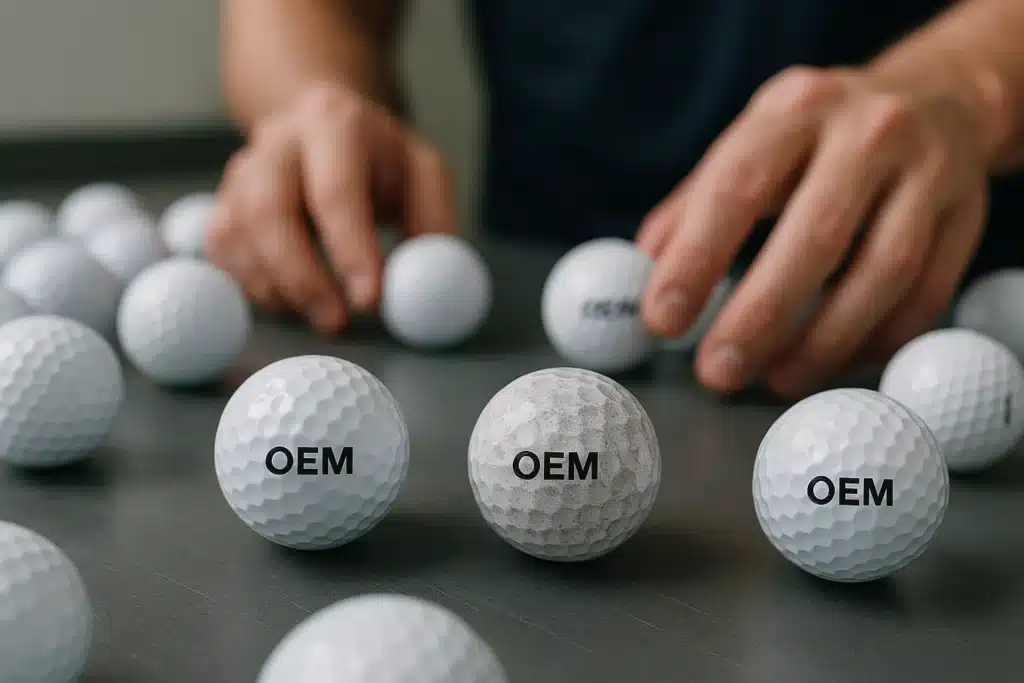
Here’s a quick look inside a golf ball logo printing workshop so you can see how print setup and in-process checks work in real production.
A good supplier can make both methods look good on a “pretty sample.” Your job is to force the proof to look good on the same ball model and finish you’ll actually order, and to make edge quality and bonding visible via macro photos and adhesion evidence.
![]()
A UK golf retailer tested pad vs UV on the same glossy finish and found UV rendered sharper detail for shelf viewing. They switched after early batches triggered complaints about “soft-looking” marks in customer photos. The team tightened proof rules and required macro photos on the final ball type before approving the next run. Receiving became easier to enforce because the approval matched what arrived. Validate the method on your exact finish, not screenshots.
Which printing method fits your logo and volume?
If you only compare pad vs UV, you risk forcing the wrong process onto your design—or ignoring a specialty option that fits your visual goal and durability requirements.
Start with your artwork: spot-color logos usually map to pad (or screen for bold solid areas), while gradients/photo-like art map to UV or heat transfer. Treat laser marking as a specialty option only when your cover/finish supports it and the look still matches your brand, then validate with an on-ball proof and macro photos.
A practical method shortlist is built from the smallest detail that must stay readable:
-
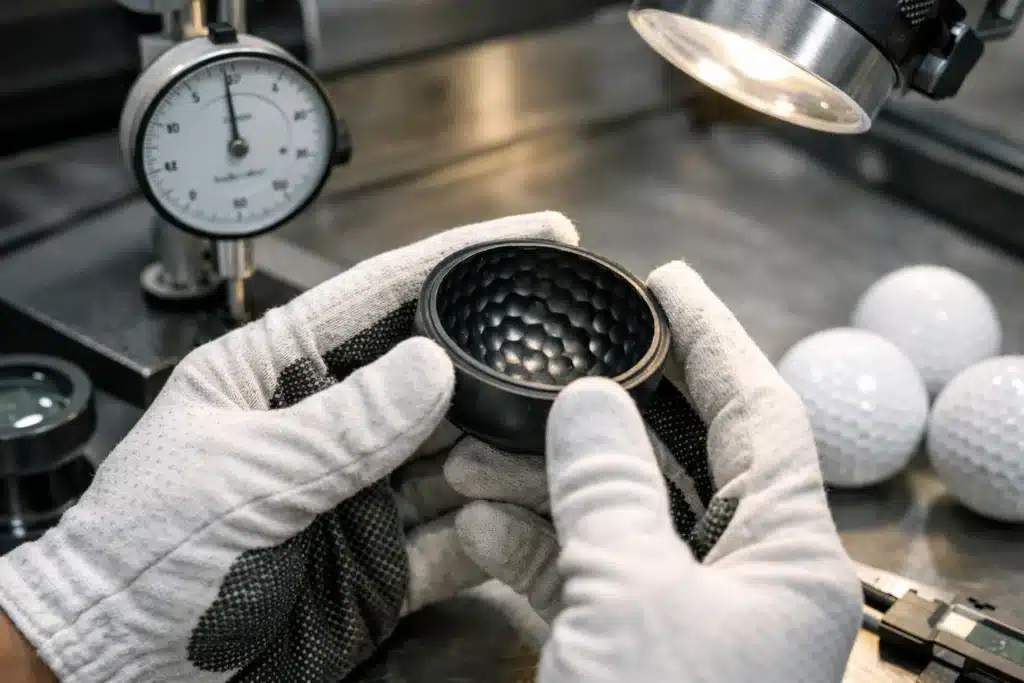
If your logo includes micro-text or thin lines, macro inspection becomes non-negotiable because curved surfaces magnify edge breakup and mis-registration.
-
If your logo relies on gradients or photographic detail, you’ll want a process that can render smooth transitions at the actual print size.
-
If your program is retail-facing, “looks good under controlled lighting” matters as much as “looks good in a zoomed mockup.”
For US/EU programs, treat compliance as a gate, not a footnote. Request MSDS + ink brand/series + a destination-market compliance statement for the ink system used on your cover material, and file it with the order so it doesn’t become a last-minute delay.
✔ True — Your smallest text and thinnest line decide the method shortlist.
A method can be “premium” and still fail your logo if fine strokes break up at real size. Require vector artwork, minimum line rules, and 20× macro photos on the final ball type so you approve what will be mass-produced.
✘ False — “Any method can print any logo equally well.”
Every process has limits in edge rendering, registration, and gradient handling on curved covers. Shortlist methods by your actual artwork constraints, then eliminate the rest with one proof cycle.
Can you print a logo on any golf ball cover material?
Most golf balls can be printed, but not every print will stay bonded on every cover and finish. This is where Surlyn vs urethane becomes a sourcing variable, not trivia.
Most golf balls can be logo-printed, but adhesion depends on matching the cover material (and sometimes the surface finish) to the ink system and curing process. Before tooling, require an on-ball proof on your chosen Surlyn/urethane cover and finish, plus an adhesion deliverable tied to that exact combination.
A supplier’s “generic sample” proves capability, not compatibility. Your safer workflow is to lock the ball model and finish first, then confirm the ink system and surface prep that will be used for that cover. Approve a golden sample that becomes the reference for production, and don’t allow substitutions (different finish, different ink series, different cure settings) without a new proof.
Does matte vs glossy finish change print results?
It can, and the risk isn’t only color perception. Gloss can make colors pop but also makes edge defects more visible under retail lighting. Matte can change how color reads and how fine details appear. The simplest prevention is to approve color and edge quality on the exact finish under a defined viewing method, then store the proof file and macro photo set with your PO.
What should be in your QC checklist for acceptance?
If your acceptance standards are vague, every dispute becomes subjective. A buyer-friendly QC checklist turns “print quality” into deliverables your warehouse can check.
A strong QC checklist converts “print quality” into evidence: adhesion proof, macro edge photos, color intent records, and batch logs that link approval to production. If a supplier can’t show how they verify bonding, edge clarity, compliance docs, and consistency from pre-production to the run, you’re taking on avoidable program risk.
| QC dimension | What can go wrong | What to request | How to verify | Accept/reject rule |
|---|---|---|---|---|
| Adhesion | Peeling/chipping | Adhesion photo/video log | Evidence tied to batch/date | Pass per agreed method |
| Edge clarity | Jagged micro-text | 20× macro photos | Smallest text readable | No edge breakup |
| Registration | Color misalignment | Multi-color proof + macro | Visual alignment check | No visible offset |
| Color intent | Brand mismatch | Proof with codes + record | Approval under defined lighting | Matches documented method |
| Placement | Off-center | Print area dimensions on proof | Random sample photos | Within agreed language |
| Consistency | Sample ≠ mass | Pre-production sample + QC log | Spot-check photos across run | Matches golden sample |
| Compliance docs | Customs/retail delays | MSDS + ink brand/series + compliance statement | Docs match destination requirements | Docs received pre-production |

This approach also improves quote clarity. When you ask for deliverables up front, you surface the real cost drivers early—tooling/plates, color complexity, revision loops, extra inspection, and evidence packages—so you don’t discover “surprise items” mid-program.
Ask the supplier to quote your order with (1) the print method + ink system by cover material, (2) the exact QC acceptance criteria you’ll use, and (3) the test deliverables they will provide for the production batch (photos/videos/logs).
How do you plan proofs and shipping to hit event dates?
Delays usually come from avoidable loop-backs: unclear files, endless revisions, and packaging choices that don’t match transit risk. Fix those and your timeline becomes much more predictable.
Your event-date safety margin is determined by how fast you lock artwork and how strictly you control revisions before tooling. Plan around one approved proof, one pre-production sample, and one packaging spec, then require packing photos and batch records so your warehouse receives balls that match approval.
Start by tightening proof discipline. Require vector artwork (AI/EPS/PDF) whenever possible, or a transparent PNG prepared at the real print size with high resolution. Make the proof include print area dimensions, placement notes, and color intent codes, so you are approving the output that will actually be produced—not a zoomed rendering that hides flaws.
Then protect sample-to-mass consistency. A pre-production sample is the bridge between approval and the full run, and a batch QC log helps prevent drift in settings and curing windows. Randomized in-process photos make it harder for a single “nice sample” to represent the whole batch.
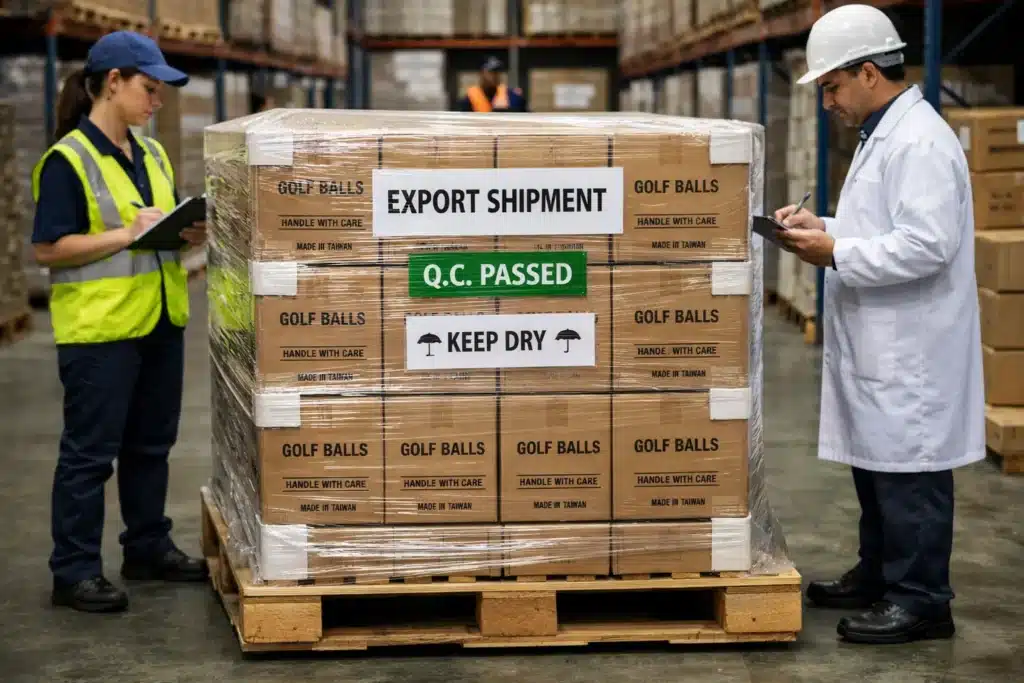
Finally, treat packaging as risk control, not decoration. Some transport studies report lower mechanical damage when packing includes internal separation versus no internal separation, but results vary by route, handling, and carton strength. The buyer-safe action is to request the packaging spec sheet plus real packing photos, then choose structure (sleeves/boxes/dividers) when scuffs and box-crush would create customer complaints.

✔ True — Deadlines improve most when proofs and evidence are locked early.
When proofs include sizing and codes, revision loops shrink. When a pre-production sample and batch logs exist, production matches approval more often. When packing specs and photos are locked, transit damage becomes an inspectable variable instead of a surprise.
✘ False — “Rush orders only depend on factory speed.”
Most delays start upstream with unclear artwork, undefined acceptance criteria, or last-minute packaging changes. A locked proof and a locked QC plan prevent the scramble.
FAQ
How long do logos last on custom golf balls?
Logo life depends on how well the ink bonds to your cover material and what you define as acceptable cosmetic wear for your program. Treat “lasting” as evidence-backed performance on your exact cover/finish, not a generic promise.
- Request an adhesion deliverable on your exact cover/finish, tied to batch/date.
- Verify wear expectations with macro photos after controlled handling or impact-style wear.
- Define acceptance around “bonding” vs “cosmetic change” (event gifts and retail differ).
- Store the approved proof + evidence with the PO so receiving can enforce it.
Is pad printing or UV printing better for urethane covers?
Either can work on urethane, but the deciding factor is the supplier’s proven ink system on your urethane finish plus your logo complexity at real size.
- Request an on-ball proof on the exact urethane model/finish you’ll order.
- Verify bonding with an adhesion deliverable, not just a clean sample photo.
- Verify micro-text and fine lines via 20× macro photos on the final ball type.
- Accept only after a golden sample is approved and referenced in the batch plan.
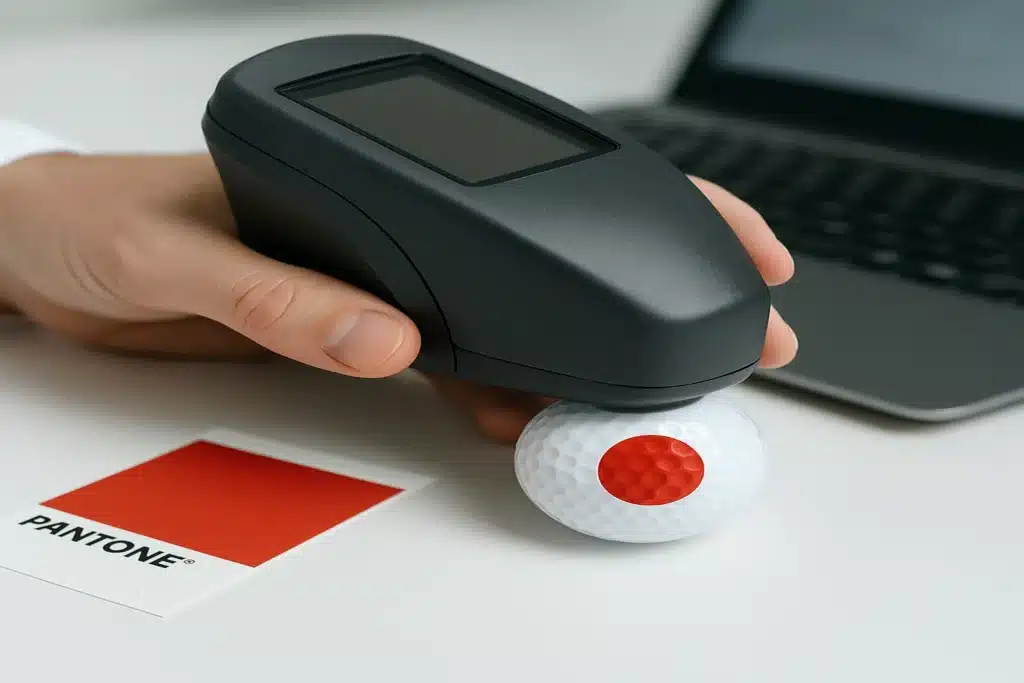
How do I avoid Pantone disputes on printed golf balls?
Treat Pantone as intent and approve color on the actual ball under a defined viewing method, then document it. This turns “looks off” debates into a check against a written method.
- Request proof files that include color intent codes and print area dimensions.
- Verify with an on-ball approval under defined lighting (photo log helps).
- Accept/reject using the documented method, not screen appearance.
- Keep a Pantone matching record linked to the approved proof.
What file format should I send for the cleanest logo edges?
Vector artwork is the safest way to preserve clean edges and reduce revisions, especially for small logos and micro-text. If vector isn’t possible, use a high-resolution PNG prepared at real print size.
- Preferred: AI/EPS/PDF vector; backup: transparent PNG at real print size, high DPI.
- Verify minimum line thickness and smallest readable text before proof approval.
- Request 20× macro photos on the first on-ball proof to confirm edges.
- Accept only if the smallest required details are readable at real size.
What packaging details prevent scuffs during ocean shipping?
Packaging prevents scuffs when it stops ball-to-ball contact and reduces movement inside the carton. The goal is structural protection, not just a nicer unboxing.
- Request the packaging spec sheet and real packing photos from the line.
- Verify separation (sleeves/boxes/dividers) when appearance is part of acceptance.
- Define what counts as rejectable cosmetic scuffing at receiving.
- Accept only if packing evidence matches the agreed spec.
How do I ensure the mass production matches the approved proof?
Consistency comes from a controlled bridge: a pre-production sample plus batch QC records tied to your golden sample. Without that, “sample-to-mass” becomes guesswork.
- Request one golden sample tied to a dated spec and the approved artwork file.
- Verify with a pre-production sample before the full run begins.
- Require batch QC logs plus randomized in-process photo evidence.
- Accept/reject by comparing random samples to the golden sample standard.
Conclusion
Choosing the best logo printing for wholesale golf balls isn’t about the newest method—it’s about controlling the variables that drive disputes: cover material and finish, logo complexity at real size, color approval method, compliance paperwork, and sample-to-mass consistency.
Require three batch deliverables—adhesion evidence, 20× macro edge photos, and a QC log—and you turn “print quality” into a verifiable standard before the shipment reaches your warehouse.
You might also like — How to Order Custom Golf Balls in Bulk with Your Logo?